Last Update Date:2023/10/24
Supported App Versions:6.10 and above
* The image on the page may differ from the actual app screen.
Create Groups
New groups can be created on the Create Group screen.
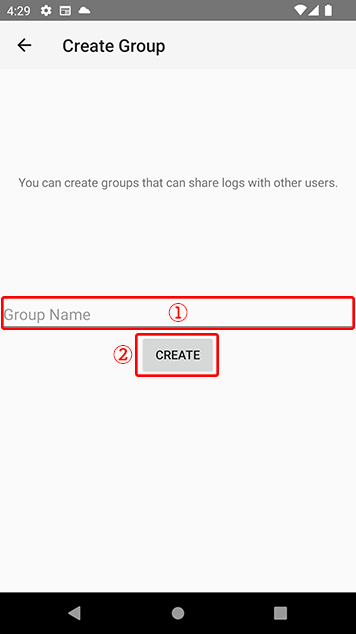
- Entry field for the name of the group to be created
- Create Group
When creating a group, a group name must be entered.
The group name can be changed later.
Group Settings
Group names can be changed and group users can be managed on the group settings screen.
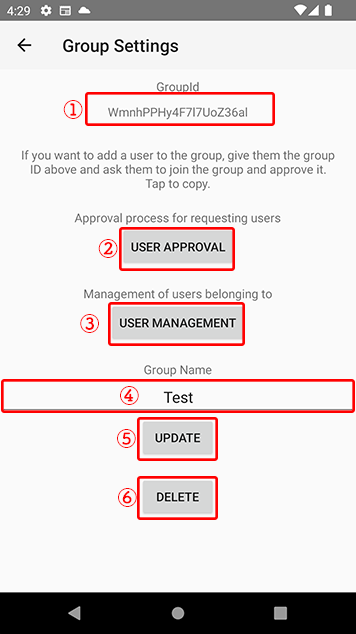
- Group ID
- Open the User Approval screen
- Open the user management screen
- Group name entry field
- Update the group name to the new name
- Delete group
The group ID can be copied by tapping the group ID in ①.
The user can be added to the group by giving the copied group ID to the user you wish to add to the group, asking the user to go through the group joining procedure, and then approving the user from the user approval screen.
Enter a group name in ④ and tap the “Update” button in ⑤ to change the group name.
Tap the “Delete” button (⑥) to delete the group.
All data related to the group will be deleted.
Depending on the capacity, it may take some time until the data is completely deleted.
User Management
Users belonging to a group can be deleted.
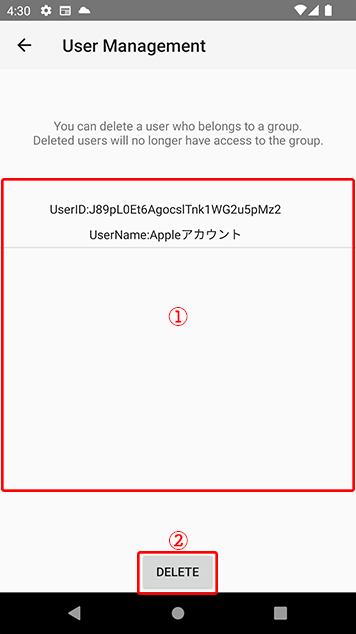
- Group User List
- Delete selected users
By selecting a user from the user list and tapping the “Delete” button, the selected user can be removed from the group.
The deleted user will no longer have access to the group.
User Approval
You can approve users who have applied to join the group.
Other users who know the group ID can apply to join.
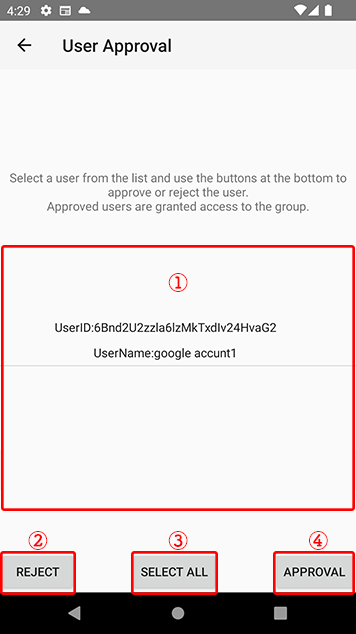
- List of pending users
- Selected user’s application rejected
- Select all users with pending applications displayed
- Approve selected user’s application
After selecting the users to be included in the group and tapping the “Approval” button, the users are granted access to the group.
If you do not want a user to join the group, you can reject their request to join by tapping the “Reject” button.